The Ford Ranger is a very popular vehicle and people are increasingly steering away from fitting the likes of bull bars and nudge bars.
As you may have seen in our specialty bracket sub-listing, we have brackets to suit our ST3K 20LED 21.5” slim lightbar for the lower grill section of the PX2 Ford Ranger.
Although designed and specified for the PX2, the same brackets are able to be mounted to the PX3 model, with a couple of provisoes...
The PX3 Ranger can be optioned with and without an AEB (autonomous emergency braking) radar, which now places this centrally in the lower grill. (shown below)

The clearance of the light-bar to the upper part of the bumper opening is identical to the PX2 ranger, however, Ford has enlarged the opening on the bottom edge only.
The brackets were originally designed for the PX2, however, they will fit the PX3 rangers without tech pack and also with tech pack, albeit with two separate bars.

Installation is as follows.
- Evenly distribute each pair of brackets comfortably next to the AEB radar. (typically this is centered nicely on the grill)
- Measure up the required space so the light bar can slip straight in and mark where the holes need to be drilled. (Don't worry if the holes are slightly out, the bracket holes are slotted and will pick up any discrepancy)
- With the grill removed, reach down with a cordless drill and drill four holes at the marked positions.
- Offer each light bar into the brackets, and lightly tighten to help position the brackets on to the impact beam.
- Once you are happy with the position of the lights, reach down and tighten all bolts holding the brackets down to the impact beam.
- Once brackets are tight, replace the grille and other parts that were removed and tighten lights in an approximate plumb position.
- Aim to the desired height at night time.
 |
 |
 |
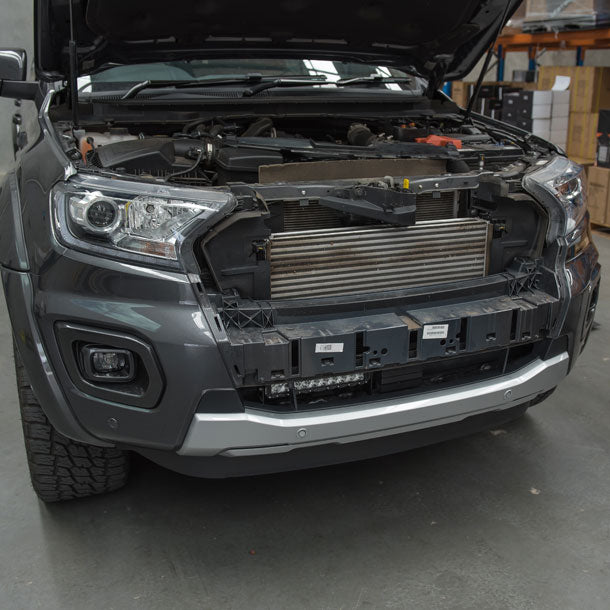
The grille will need to be removed as well as the radiator cover to gain the most access to the impact beam. There are 2 clips shown in the above photo.
 |
 |
 |
With the grille now removed, place the brackets into position and dummy fit the light so that you have the correct spacing when drilling. Once you have both brackets in position, best done using a drill that is corded and does not have the additional thickness from the battery pack, drill the holes required for the 2 smaller bracket pieces.
Finally, secure the lights and brackets to the impact beam. For help with wiring, refer to our wiring article.
Required components
- 2x ST3K 10LED 11.5" lights
- 2x Ranger lower brackets
- 1x Smart wiring harness
- 1x Ranger piggyback adaptor
Complete Bundle